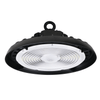
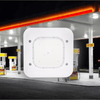
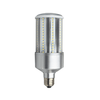
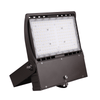
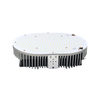
UFO LED High bay light is an excellent lighting option for large commercial spaces. Its illumination is perfect for ensuring the light disperses illumination at every corner. The high bay LED light can be used in several locations like warehouses, factories, workshops, departmental stores, airports, carports, basements, and other comprehensive indoors. There are several benefits of LED lights for warehouses. But, it depends on the installation as it can influence the light’s performance. Moving forward, we will discuss several methods used to hang UFO LED high bay lights and the steps involved in the installation.
1/2” NPT mount

In the 1/2 NPT mounting method, the UFO LED high bay light is not directly mounted to the ceiling. The light is secured with a complete setup, including steel pipe and mounting brackets. You can complete the installation part with easy steps -
- Align the mounting bracket around the light.
- Unscrew the 1/2” NPT nut.
- Fix the steel pipe and mounting brackets together.
- Complete the wiring procedure.
Hook mount

Hook mount is a popular method to hang UFO LED high bay light. You do not need to worry about the fixture as it is securely hanged to the ceiling via hooks.
- Disconnect the power - To avoid electric shocks or other hazardous issues, it is highly recommended that you start your installation by powering off the main current supply.
- Fix wiring - Connect the wires correctly. Connect the neutral wire with the neutral line and the live wire to the current live end. Don’t get mixed up with the wires, as it will end up in a non-lit light.
- Take the hook hanger and screw it - The UFO LED high bay lights that are suitable for hook mounting option to contain a cavity on top of the light to screw the hook for installation. If not, then drill one hole to make the installation easy. Then, use the hook hanger and directly screw it properly.
- Hang the high bay LED light to the mount - Carefully lift the light and hang it to where the hanger is not already set up.
- Set up the dimmer - This is an optional step as not every UFO LED high bay light comes with a dimming feature. However, if you have one with that feature, connect the spare wire of the light with the dimming switch to activate the dimming feature.
- Re-connect the power - Once you are done with all the mounting steps, turn the power connection on, and you are good to go with using the high bay LED light.
Ceiling mount

The most commonly used method is ceiling mount. A U-shaped bracket is involved in this installation. You are supposed to align the U-bracket with the lighting fixture to install it on the ceiling. The method is highly recommended if you are looking to set up the lights from different angles. Follow the steps to install the high bay LED light on the ceiling.
- Turn off the power - To avoid any uncertainties like power cus, electric shocks, or other troubles, power off the main supply before installing the UFO LED high bay light.
- Fix the wires - Like the method mentioned above in the hook mount option, connect the fixture wires with the power set up.
- Align the U-bracket for mounting - Carefully align the U-bracket with the light and screw it properly as the light will be fixed to the ceiling via the bracket.
- Hang the U-shaped bracket - Mark the U-bracket holes on the surface where you want to hang the light. Drill holes on the marks and firmly fix the light with screws and nuts so the light will not wobble.
- Adjust the light by setting the angle - Now adjust the light’s angle. First, rotate the light wherever you wish to disperse the illumination. Then, carefully put the angle, so you don’t have to do it again.
- Turn on the power back - Now turn on the main power, and you are all set to use your high bay LED light.
Conclusion:
Thinking that it does not matter what light you choose for the high bay, it will require the same method to hang it is a misleading perception because every light type has a different installation method. You should look for the installation type first while buying the fixture as all the steps are very different than the other. Consider these installation methods to get a clear idea of what kind of UFO LED high bay light you want to make the installation part less hefty.


