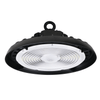
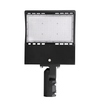
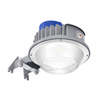
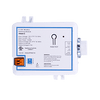
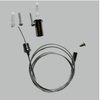
How often do you use your controllable lighting fixtures? Especially how they are being used with high bay lighting. The dimming motion sensor is being used to illuminates the lights when you need it. No extra lighting and wattage would waste just to illuminate the wide space.
The 360° 3 Step Dimming Motion & Daylight Sensor for UFO High bay has been built with an automatic daylight sensor with the 1V - 10V interface of dimming. You can install this fixture up to 49 feet with a wide detection diameter of 15 meters. In this article, we will be discussing the mentioned topics:
- What are the features of dimming motion sensor?
- How is it beneficial?
- How to make wire connection with the fixture?
- What are the application spaces?
- Where to buy?
What are the features of 3-step dimming motion sensors?
Features define the capabilities of the fixture. In this section of the articles, we will tell you its features below:
- Daylight Sensor: The fixture will start illuminated the space according to the ambient lighting.
- Detection Space: The detection area decides how much a fixture can illuminate the space from the high bay ceiling. The fixtures would be installed at the height of 49ft and can detection diameter is above from 15 meters.
- 3 Step Dimming Motion:
- No motion detected all LED lighting fixtures were switched off.
- If any fixture detects motion from anywhere, all fixtures will turn on altogether. If no motion detected in the directed space, all lights dim the lighting output after hold time.
- After the standby period, that lighting fixture switches off, if there is no movement is detected in the directional zone.
How is it beneficial?
The 3-step dimming motion & daylight sensor adds benefits while operating an LED light with it such as energy-efficiency, detecting motion from a distance of 15 meters. The motion sensor can also work in a standby mode which operates on 0.5W consumption. It is compatible with industrial lighting fixtures such as UFO LED High Bay Lights and LED Linear High Bay Lights.
How to make its wire connection with the fixture?
It is not a cumbersome process to connect the dimming motion sensor with the fixture. It is a DIY procedure, just follow the below-mentioned steps:
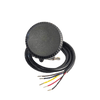
Step 1: Pair the black supply wire with the black LED fixture wire.
Step 2: Connect the ground supply wire with the ground LED Lighting fixture wire.
Step 3: Pair the white supply wire with the white fixture wire.
Step 4: Connect the purple (+) wire with the blue or white (Hot) wire.
Step 5: Pair the grey (-) wire with the brown (Neutral) wire.
Step 6: Connect each wire using connectors and secure them with electrical tape.

This is how you can make a wiring connection between a dimming motion sensor and the fixture.
Where to buy?
At LEDMyplace, you can easily find the dimming motion sensor. In this article, we have covered all the major factors about the motion sensor. We hope that this blog clears all your doubts and questions in your mind, if not then mention your question in the comment section below.


