


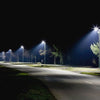


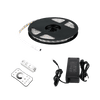
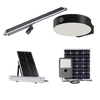


Installing the LED Strip Lights is a perfect way to illuminate the building or an object in a unique way. The process is very easy and has a very simple step by step procedure to install strip light at any application space. It is a DIY process although it's always appreciable to consult with an electrician first before start installation. LEDMyplace offers installation guides to help you install the fixture by on your own.

|
THINGS TO KNOW BEFORE INSTALLATION
|

How To Cut LED Strip Lights?
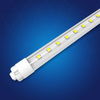
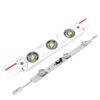
LED strip lights are also known as LED Tape Light. To make the installation easier, we have made this light with 3M adhesive tape. To cut the strip properly and do not cut it from anywhere. The aluminum solder pads are already mentioned on the strip light, you can cut the light only from that point otherwise you will affect the whole strip light. After cutting the strip light secure it with the connector.
If you have an IP20 LED Strip Light you can cut the lights after 8 LED chips or follow aluminum solder for accuracy. IP65 and IP68 rated strip lights are able to cut after 3 LEDs.

How To Choose Power Supply?
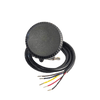
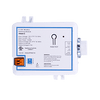
The driver helps to convert the AC (Alternate Current) to DC (Direct Current). Before you start with the installation, it is must to have a compatible driver which goes with the LED strip light. Well, it is quite difficult to select an ideal driver, let us describe in an easy way:
For example, you are purchasing two LED Strip lights which wattage conjoint wattage is 60W (30W each) you need to select the driver which is near to the conjoint wattage of the lighting fixture such as you to have options of 60W, 70W, or 80W. You have to select the 70W which gives the best lighting output. If you select the 60W, you would get the dim, low, and blurry light or if you select 80W, there are chances that the fixture catches fire or doesn’t work.

Step By Step LED Strip Light Installation
As you have already learned, how to cut the LED Strip Light and how to select the reliable driver for the strip light fixture. Now this article will further guide how you can install the strip light to your space.

Step 1: Start with the driver, first connect the driver with a power source with the help of neutral wire, earth wire, and line wire (you need to buy this wire by yourself).

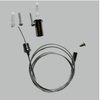
Step 2: Cut the strip light wire and connect the positive line (red wire) to the positive section of the driver and negative line (blue and black wire) with the negative section of the driver.
P.S. The positive and negative connections are mentioned on the driver for easy installation.

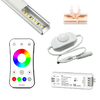
Step 3: Connect the driver with dimmer (if you consider dimming your strip light). If you don’t want a dimmer then you can directly connect the driver with strip light or controller.

Step 4: If you have purchased an RGB strip light then it is must install a controller with the dimmer to change the lighting color output of LED Strip Lights.

Step 5: After connecting the controller with the dimmer, connect the controller with strip light and remove the tape sealing from the back of the strip light and place it to space.
If you bought a Single Color LED Strip Light then you just need a compatible driver and connect the driver with the strip light through male and female connecting wire.
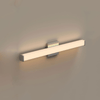
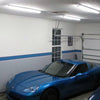
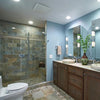
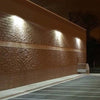
How To Install LED Strip Lights on Ceiling
Using LED strip lights, you can decorate your false ceiling like never before. You can use the adhesive side of the light to paste the strip light. Beautiful looking, these strip lights can navigate around the room through your drop-down ceiling to create stunning effects. You can redefine your interiors by using the stunning bright waterproof LED strip lights. The design of an individual drop-down ceiling or false ceiling may vary but the LED strip light can be applied in each and every scenario due to the strip light’s flexibility.